
Why does a handheld laser weld develop porosity, cracks, spatter, or incomplete fusion?
Most handheld laser welding defects are linked to surface contamination, poor joint fit-up, inadequate shielding, incorrect welding parameters, or unstable equipment performance.
The right fix depends on the defect. Increasing laser power may help an under-penetrated joint, but it can make spatter, burn-through, and other problems worse.
Before adjusting your handheld laser welder, identify what the weld is telling you.
| Welding Defect | Common Cause | What to Check First |
|---|---|---|
| Porosity / Pinholes | Contamination, poor shielding, unstable weld pool | Cleaning and gas coverage |
| Cracking | Alloy sensitivity, filler mismatch, welding stress | Material and joint condition |
| Lack of Fusion | Insufficient energy, excessive speed, poor fit-up | Focus, gap, and penetration |
| Spatter / Burn-Through | Excessive energy density or heat input | Power, speed, and spot settings |
| Undercut / Uneven Bead | Incorrect travel speed, beam position, or wire feed | Weld shape and filler delivery |
| Discoloration / Oxidation | Inadequate shielding, contamination, excessive heat | Gas coverage and surface condition |
A weld that looks smooth is not necessarily defect-free. Internal porosity and incomplete fusion may remain hidden beneath the surface.
This guide explains how to identify common defects, correct their causes, and prevent the same problems during production.https://www.youtube.com/embed/hfbQzcDIJOk
1. How Do You Fix Common Handheld Laser Welding Defects?
Different defects require different corrections. Before changing machine settings, inspect the material, joint, and welding conditions.
Porosity and Pinholes
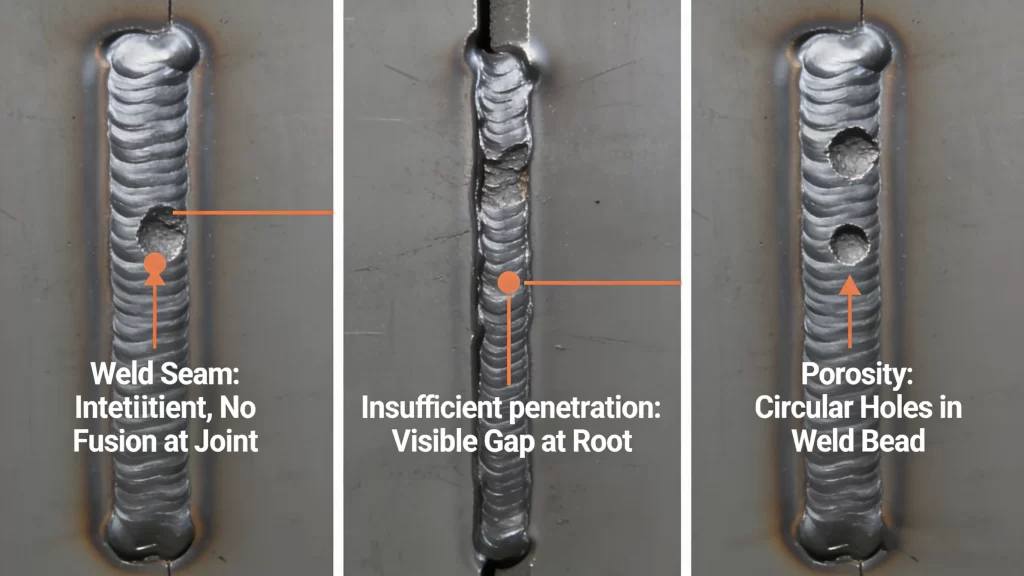
Porosity appears as small holes or cavities inside or on the surface of the weld.
It occurs when gas becomes trapped in the molten metal as the weld solidifies.
Common causes include oil, moisture, surface oxides, poor shielding gas coverage, and instability in the molten weld pool. For a deeper look at reducing porosity in laser welding stainless steel, see our dedicated guide.
Aluminum can be particularly sensitive because moisture and contamination associated with its oxide layer may contribute to hydrogen porosity.
How to fix it: Clean and dry the joint, inspect shielding gas delivery, and check that the nozzle is correctly positioned. If porosity continues, test whether the laser power, travel speed, or wobble settings are making the weld pool unstable.
Do not assume that increasing gas flow will always solve porosity. Excessive flow can become turbulent and reduce shielding effectiveness.
Cracking
Weld cracking may appear along the center of the bead, across the joint, or near the end of the weld.
Unlike simple surface discoloration, cracks can compromise the structural integrity of the joint.
Cracking may result from unsuitable alloy composition, excessive welding stress, inappropriate filler material, or unfavorable weld-pool solidification.
How to fix it: Confirm the base metal and filler compatibility, inspect joint restraint and fit-up, and review heat input and weld geometry.
If a crack has already formed, do not simply weld over it. The defective area may need to be removed and repaired using a qualified procedure.
Increasing laser power without addressing the underlying cause can make cracking worse.
Lack of Fusion and Penetration
Lack of fusion occurs when molten weld metal does not properly bond with the base material or an adjacent weld pass.
Incomplete penetration is different: the weld does not reach the required depth or joint root.
Both can produce weak joints even when the visible surface bead appears acceptable.
Typical causes include insufficient energy delivery, excessive welding speed, incorrect focus, poor joint fit-up, and unsuitable beam positioning.
How to fix it: Confirm the joint gap and focus first. Then evaluate whether power, travel speed, and wobble width provide sufficient energy at the required fusion area.
For example, an excessively wide wobble pattern may spread energy across the surface while reducing penetration.
Where joint strength matters, verify penetration using suitable inspection or a representative cross-section instead of relying only on appearance.
Spatter and Burn-Through
Spatter occurs when molten metal is ejected from an unstable weld pool.
Burn-through occurs when excessive localized energy melts through the workpiece.
These problems are especially common when thin material is welded with too much energy or insufficient travel speed.
Surface contamination, unstable wire feeding, and incorrect focus can also contribute to spatter.
How to fix it: Review energy concentration and travel speed. Reduce excessive power or adjust the beam pattern when the weld pool is too aggressive.
On thin sheet, stable torch movement and consistent working distance are essential.
Also inspect the protective lens and nozzle. Heavy spatter buildup can affect the welding head and lead to further instability.
Undercut, Excess Filler, and Discoloration
Undercut appears as a groove beside the weld toe where base material has been melted away without sufficient filling.
An excessively raised bead can occur when too much filler wire is delivered relative to the available melting energy and travel speed.
Discoloration, particularly on stainless steel, is commonly associated with oxidation during welding.
How to fix it: For undercut or excessive buildup, review beam alignment, welding speed, wobble width, and wire-feed rate.
For discoloration, check the surface condition, shielding gas coverage, and heat input.
Remember that stainless steel heat tint can be more than a cosmetic issue. Where corrosion resistance is important, the finished weld may require additional surface treatment or verification.
2. Why Do Defects Change Across Different Metals?
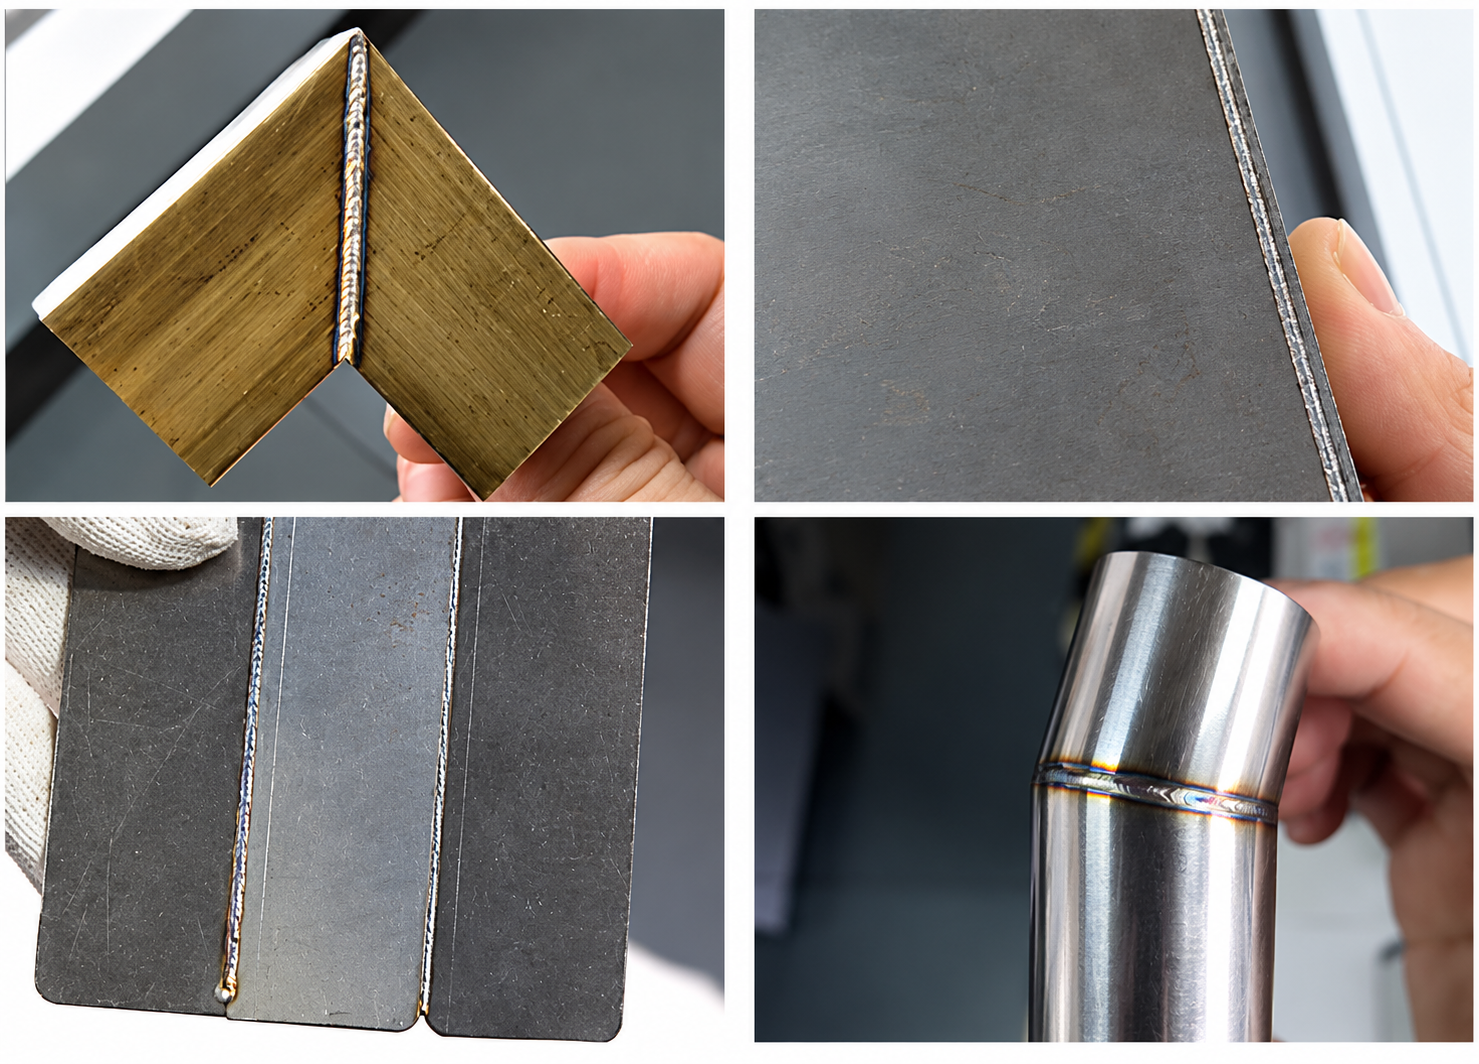
The same fiber laser welder can produce different results on stainless steel, aluminum, and galvanized steel.
Material properties influence how laser energy is absorbed, how the molten pool behaves, and which defects are most likely, which is why the metals a handheld laser welder can weld each need different settings.
Stainless Steel: Discoloration and Incomplete Fusion
Stainless steel is widely used for kitchen equipment, cabinets, enclosures, and architectural components.
Common concerns include weld discoloration, insufficient penetration, undercut, and distortion on thin sections.
Discoloration may result from inadequate shielding or excessive heat exposure.
Incomplete fusion can occur when the joint is poorly aligned or welding speed is too high for the available energy.
For consistent results, maintain clean material, stable shielding, accurate focus, and a suitable balance between power and travel speed.
If the finished component requires high corrosion resistance, inspect the heat-affected surface and follow the applicable finishing requirements.
Aluminum: Porosity and Burn-Through
Aluminum reflects laser energy strongly and transfers heat rapidly.
These characteristics can make the weld pool more difficult to stabilize than with ordinary stainless steel.
The oxide layer and surface moisture can contribute to porosity, while excessive heat input can quickly burn through thin sections.
Before welding, remove oil and oxide using suitable cleaning methods, maintain accurate joint fit-up, and use the appropriate filler and shielding gas. For detailed settings, see our guide on how to laser weld aluminum with a handheld laser welder.
If porosity or burn-through occurs, check cleaning, focus, and weld-pool behavior before making large power changes.
Galvanized Steel: Porosity and Spatter
Galvanized steel introduces an additional challenge because the zinc coating vaporizes at temperatures below the melting point of steel.
When zinc vapor becomes trapped in the weld pool, it can produce porosity, blowholes, and spatter.
The problem can be especially significant in lap joints where zinc vapor has limited space to escape.
For a laser welding machine used on galvanized sheet, follow a validated process that accounts for the coating, joint design, and required ventilation.
Increasing power or changing shielding gas alone will not necessarily eliminate zinc-related defects.
3. What Is the Best Troubleshooting Order?
One of the most common mistakes is adjusting multiple welding parameters before checking the basic setup.
When a defect appears, follow a consistent sequence.
Step 1: Identify the Defect
Determine whether the problem is porosity, cracking, insufficient fusion, spatter, undercut, or discoloration.
Note where it appears.
A defect occurring at the start of every weld may have a different cause from one appearing randomly along the seam.
For critical joints, use appropriate inspection methods because some defects cannot be identified from the surface alone.
Step 2: Check Material and Joint Fit-Up
Confirm the material grade, thickness, surface condition, and joint geometry.
Look for contamination, inconsistent gaps, poor alignment, or loose fixtures.
A well-prepared joint is easier to weld consistently than one with changing gaps or contaminated edges.
Do not compensate for incorrect fit-up by immediately increasing laser power.
Step 3: Check Shielding Gas
Verify that the selected shielding gas is appropriate for the material and process.
Inspect the regulator, hoses, nozzle, and gas delivery for leaks or restrictions.
Check whether workshop drafts are disturbing the shielding area.
Use the manufacturer’s recommended gas-flow range rather than assuming that more flow always produces a cleaner weld.
Step 4: Inspect the Welding Head and Wire Feeder
Check accessible protective optics, nozzle condition, working distance, and wire-feeding consistency according to the equipment manual.
A damaged protective lens, unstable wire feed, or incorrect focus can create defects even when the programmed parameters are unchanged.
If the machine shows repeated alarms, abnormal laser output, or optical problems, stop and involve qualified service personnel. Do not bypass interlocks or open internal laser components to troubleshoot.
Step 5: Adjust and Verify the Parameters
Only after the previous checks should you adjust laser power, travel speed, wobble width, or wire-feed rate.
Change one major variable at a time.
Make a test weld on material matching the actual production part.
Then inspect the bead and verify penetration and fusion as required.
The goal is not simply to make the weld look better. It is to identify the actual cause and confirm that the correction works.
4. How Can You Prevent Welding Defects in Production?
Most recurring defects can be reduced by building a repeatable welding process.
A consistent setup often matters more than constantly searching for new parameter combinations.
Keep Material Preparation Consistent
Start each job with the correct material, surface condition, and joint alignment.
Remove oil, rust, moisture, and unsuitable coatings from the welding area.
Use fixtures where necessary to maintain stable joint fit-up.
This helps reduce variation between parts and gives the welding process more consistent starting conditions.
Match Power, Speed, and Wobble
Higher laser power does not automatically produce a better weld.
The correct setting depends on the material, thickness, joint type, and required penetration.
For thin material, excessive energy can cause burn-through.
For thicker joints, insufficient energy delivery or excessive travel speed may lead to incomplete fusion.
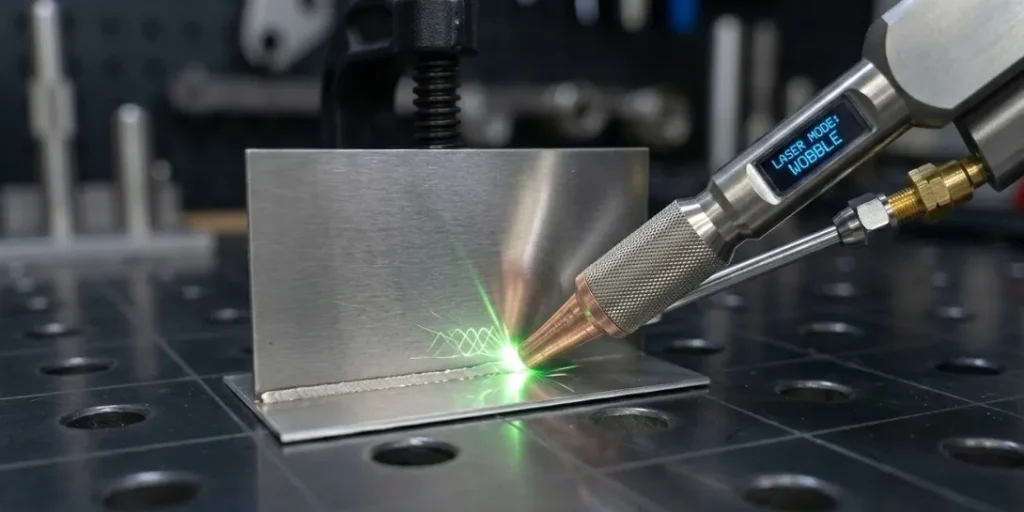
Beam wobble can help shape the weld and accommodate limited joint variation, but an overly wide pattern may reduce penetration.
For regular production, save the validated settings for each material and joint configuration.
Maintain Stable Wire Feeding
For handheld laser welders equipped with filler-wire feeding, stable wire delivery is important for consistent bead formation.
Irregular feeding can create excess buildup, interruptions, spatter, or incomplete filling.
Check wire diameter compatibility, drive-roll condition, feed-path cleanliness, and spool tension as part of a proper wire feeding setup for handheld laser welding.
If the feeder repeatedly jams or delivers wire inconsistently, correct the mechanical problem before compensating with laser power.
Know When the Machine Is the Problem
Not every recurring defect comes from the operator.
If weld quality changes while the material, parameters, and setup remain consistent, inspect the equipment, including checking why your laser welder may be overheating.
Possible causes include protective-optic contamination, welding-head misalignment, wire-feeder malfunction, and unstable machine operation.
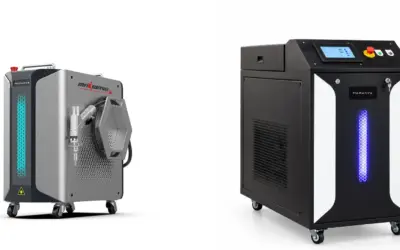
A professionally designed handheld fiber laser welder should provide consistent beam control, reliable wire feeding, and clear equipment-status information to help operators identify setup or hardware problems.
MaxWave handheld laser welders offer adjustable beam oscillation, controlled wire feeding, and built-in operating-status and protection features. These can support more repeatable welding when the machine is correctly configured for the application.
However, no machine can eliminate defects caused by poor joint preparation or incorrect welding procedures.
For industrial production, verify the process through representative sample welding and the applicable quality requirements before scaling up.
Conclusion
What causes common handheld laser welding defects, and how can you prevent them?
Most defects are associated with a combination of material contamination, poor joint fit-up, shielding problems, incorrect parameters, and equipment instability.
Porosity often requires attention to cleanliness and shielding.
Cracking requires examination of the alloy, weld geometry, and material condition.
Incomplete fusion calls for checking focus, joint alignment, and energy delivery.
Spatter, undercut, and burn-through often require adjustments to heat input, beam control, travel speed, or filler-wire feeding.
The most reliable troubleshooting sequence is:
Identify the defect → Check the material → Verify shielding → Inspect equipment → Adjust and test
Do not rely on visual appearance alone when weld strength or compliance is important.
For fabrication shops using a laser welder for metal, reliable production comes from combining suitable equipment with a controlled and repeatable process.
If your workshop is experiencing porosity, incomplete fusion, spatter, or inconsistent weld quality, send MaxWave your material grade, thickness, joint type, welding parameters, and photographs of the defect.
Our team can help review your application, recommend an appropriate handheld laser welder configuration, and arrange sample welding to evaluate weld quality before you select a machine.

0 Comments